Showing posts with label blogposts. Show all posts

14 Oct 2014

How to pop

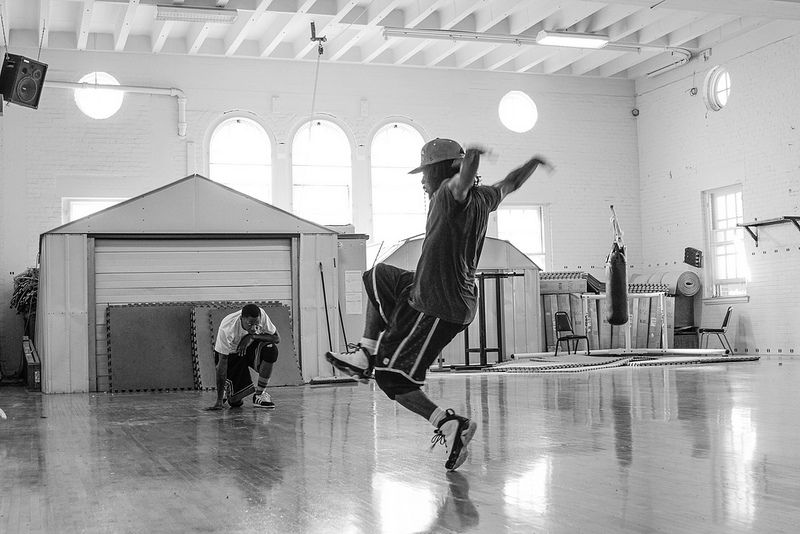
What is Popping?
A style of hip hop dance which originated from California during the 70's. Popping is can be seen as the contracting and loosening of muscles in a sharp movement creating a pop effect known as a pop or hit. popping can be seen as one of the fundamental movements needed for dancing the robot.


Step 1) Hold out one of your arms straight out with a slight bend in your elbow, remember to keep your arm relaxed and loose, if the arm is too tense then you wont be able to create the popping effect,


Step 2) Tense the muscles within that arm for 5 seconds.

Step 3) Relaxing that arm for 5 seconds.

Step 4) Repeat that step with twice then do it again, this time doing it one second less than before until you reach one second.

Step 5) TAKE A BREAK, this will allow your arm to process the movement and reduce you getting cramps of injured.

Step 6)Ttry step 1-4 again but doing it in half a second. you should start to see a popping like effect occur with your arm.

Step 7) Switch over to the other arm and repeat previous steps again.

Step 8) As you get more used to it try to tense even faster this will create a harder it.

Step 9) After you have mastered the basic pop, try and pop at different angles in the arm and different levels.


Step 10) Create a routine using what you have just learnt in it. show your friends and make them jealous that they can't do that awesome move


You can check out more Popping dance videos below:


Written by David

How to Krump

What is Krumping?
Originating from America, krumping is a style of street dance which is expressed through free, exaggerated and expressive movements. Krumping involves four primary move: jab, arm swings, chest pops and the stomp.


Step 1) The most basic thing you need to learn is the right stance, a lot of people have their own unique stance when krumping but the basic stance is to bend your knees and keeping your feet nice and wide making it strong while keeping your upper body upright, this will create a more aggressive look which is great to get you in the mind frame, while also helping make your moves more powerful.


The jab
Step 1) Take whatever arm you comfortable with and make it into a fist, keeping it very strong.

Step 2) imagine there is a square in front of you, with your fist, punch each of the corners of the square quickly bringing it back when you extend your arm.

Step 3) take your other arm and and repeat the previous steps.


You have mastered the Jab!!!

The arm swing

Step 1) Make sure you have a lot of energy because arm swings will drain you out very quickly.

Step 2) Extend your arm and imagine that you are grabbing something up high.

Step 3) Now throw that hand down very hard as if what ever you had in your hand you want to break it on the ground.

Step 4) Experiment throwing that imaginary object in certain directions, you may even want to use two hands to pick up the object.


You have mastered the arm swing!!!

The chest pop

Step 1) Breath in and using your diaphragm you and to make your chest expand outwards.

Step 2)  When you breath out, with a sharp movement, concave your chest, this will create a popping like effect.

Step 3) To maximise the effect of the move, only create that popping effect when hitting a beat.


You have mastered chest popping!!!

The stomp

Step 1) while in your stance, swing your knee, so that your foot it in the air.

Step 2) With a controlled but hard motion, swing your foot down to the ground, trying to dig your heel to the ground.


You have mastered the stomp!!!

last step is to mix all those moves together and practice makes perfect so don't be discouraged if you don't look right at first. Have fun krumping!!!!


Here are some videos of some pioneers of krump, showing off their moves:

This is what krump looks like when used in choreo:


Written by David

13 Oct 2014

How to Capture the Perfect Selfie

Selfies are taking over all our News Feeds 

By Angalie Welivita 


Today society is crazy about the 'selfie' they are taking over all forms of social media, and are taken by anyone and everyone. from Kim Kardahsian to my Dog and I 
   'Bruno (dog) ' OMG not another selfie' 


Below is a tutorial / chat video that goes through some steps on how to take the perfect selfie.
Im joined with one of my best friends and self -proclaimed professional selfie taker Shannon.


Note: Selfies should not be taken too seriously. The videos content is based on personal experiences - therefore we take no responsibility if tips/ steps do not work nor are followed through correctly. 


                                                      But first lemme take a Selfie 


How to deal with stress

How to Deal with Stress 

By Angalie Welivita 

Stress is something I struggle to deal with everyday of my life. Like most people you can't really tell your brain to flick a switch and stop making you feel stressed. However there are some practical ways to handle/ make it easier to deal with stress. 


1. Stress journal - as silly as it sounds, trying to figure out exactly what causes your stress will be the best thing for you. A stress journal will help with identifying the cause. A little notepad or book is all you need along with a pen. Every time you feel stressed write down what you were doing along with the time. Write down how how you physically and emotionally felt as well. 
An easy thing to do is to follow a scale. 

1 _________________________________________________________10 
lowest                                                                                                                                         happiest
(saddest, really stressed- physically and emotionally )                                                                  (happiest, not stressed at all) 


2. Things to avoid: 

Sometimes when you are feeling stressed it can be an easy option to go and have a smoke cigarettes, drink alcohol  or take drugs. 


Avoid these types of outlets. There are other options that do better for your body. 

3. Exercise - is one of the best ways to cope with stress as it releases endorphins which make you happier :D. Try to do 30min of exercise each day; even if it is going for a walk. 

4. Healthy diets - If you eat healthy foods , you have more nutrients in your body therefore giving you more energy - more energy = happier you 


5. Limit your caffeine intake - coffee, energy drinks and other unnatural sugar products can give you a temporary high , however when that ends your mood levels drop dramatically which ultimately can make you tired and lethargic . These moods can lead to higher stress levels. 

6. Take a break- Breaks are good!! We're not super humans, so having break is good. It allows the brain to stop and revive, clearing your mind up which can help you think clearly when you get back into work. 
What I tend to do is: 20 minutes of study then 10minute break time. During my break I may just get some fresh air, talk to my friends, go on Facebook. Do whatever you like. 

In terms of timing it is up to you. If you can study or do work for longer then push through! 


7. Don't isolate yourself- if you are feeling a little overwhelmed, talk to someone. Friends, family and professional councillors are always there for you. Don't bottle up your feelings, it's bad for your mental state and you will be physically and emotionally drained. This will only make stress worse for you. 

8. Management skills- Organise yourself. If studying for an exam use highlighters, flash cards, record and listen to key points; all these different ideas can help you actually absorb more information and remember it easily. 
In terms of the work place- decorate your desk with bright colours, put up pictures that make you smile. 

9. Music - music tends to be a great outlet in terms of calming me down. Make a playlist that has upbeat and happy music. 

Right now I must admit one song that makes me really happy and want to dance is Taylor Swifts -Shake it Off


10. You're Ok- Remember stress is normal, everyone experiences it and no one is perfect in handling it. So don't overwhelm yourself by trying to 'cure' your stress levels. Just try to avoid things that make you stressed - or even better try to overcome the obstacle you are facing


I would love to read any other recommendations in dealing with stress so comment below if you have any other tips. 

How to make your car handle better


HOW TO INSTALL COILOVER SUSPENSION IN YOUR CAR

By Gavin Deriu

Background:

I happen to drive a car that isn’t all that fast. It isn’t even supposed to be fast, because it’s a car that’s all about cornering. Going around corners is what it does best, but I wanted to make it even better, so I replaced the standard suspension struts with fully adjustable coilover suspension.

What does this all mean!? It basically means I took out the 4 old, soft springs (and the 4 shock absorbers that are coupled up to them) and I replaced them with 4 aftermarket springs/shocks which are more firm so they keep the car flat when you throw it into a corner. There’s also the added benefit of these new ones being adjustable, so I can change how high/low my car is whenever I want, and I can also change how soft/hard they feel when I go over bumps in the road.

Most people would take their car to a mechanic for this installation. But since I own a fairly simple car, and this kind of thing is what I actually love doing, I decided to install it all myself in my garage, and now I’m here to take you through the process.


STEP 1:
Just like with the last car DIY job I wrote about, the first step is to buy the new parts and gather together all the tools you’ll need. Here are the coilovers... YellowSpeed Racing Dynamic Pro Sports!


You’ll also need some essential tools. They include:


-          Jack stands

-          A car jack

-          A lug wrench to take the wheel nuts off
-          A socket wrench and socket set
-          Various screwdrivers
-          WD40 lubricant
-          A tape measure


STEP 2:

We’ll start by raising the front end of the car. Use the jack to lift up the left side of the car and once it’s raised high enough, slide a jack stand under that side of the car to safely hold it up. Do the same for the right side of the car. It’s a good idea to loosen the front wheels’ nuts before raising the car, and then once it’s up you can take the wheels off completely.


STEP 3:

Before I could do much work, I had to take off the plastic protector panel that is attached underneath the engine. Then you can undo the front swaybar links so that the suspension arms can move freely.


STEP 4:

To summarise a bit here, in this step you have to undo the suspension arms from the car so that they can swing down. Rather than explain the process in detail, I’ll just recommend that you do your research in relation to whatever car you are operating on (use car forums, car service manuals, or speak to a mechanic) because every car is a little different. The other important thing to note is that if you’re not confident or the process is too complicated for your particular car, it might be best to take it to a professional. Suspension is what keeps your car on the road so you wouldn’t want something going wrong when you’re driving at 110km/h!


STEP 5:

Once the suspension arms have dropped down, you go up to the engine bay and loosen the top mounts of the suspension strut. Then you undo the bottom mount of the strut and it can be angled outwards. Hopefully it looks something like this:


STEP 6:

To put in the new coilover, it’s pretty much just the reverse of what you’ve already done. Make sure you torque the bolts correctly so they don’t loosen over time and cause your wheel to fly off one day. I started with the front right wheel, so then I went on to do the same for the front left corner.


STEP 7:

Now that the two front struts have been replaced, lower the car down and raise the back end. Repeat the same process for the rear suspension as you did with the front. You might need to take the carpet panels out of your boot so you can access the top mounts. It looks pretty ugly without the boot panels!


Quick tip: in the above photo towards the upper left you’ll see the petrol lines. Be very careful around these obviously for safety reasons, but also because spilt petrol will very quickly smell out your whole garage!


STEP 8:

Once the rears have been replaced (same process as the fronts, in fact the rears are generally easier because there’s less going on down the back end) it’s now time to drop the car down completely and put the boot carpet panelling back in.


STEP 9:

At this point in time, I’d recommend you grab some food and sit down to admire your work. But the job isn’t over yet, because if you installed adjustable coilover’s like I did, they may need further adjustments to their height. This was the height of my car when I was done:


Not bad, but the rear end was a bit too low. It’s a good idea to take the car for a drive at this point and test out whether it will scrape on any speed bumps or on the kerb entering driveways etc.

Also note that NSW road laws require that your car is at least 10cm off the ground at any point (except of course the wheels, which make contact with the ground) so try to keep it above this height to avoid a fine and a defect!


Step 10:

If you care about handling performance (or if you just want to do things properly, really) you now need to get a wheel alignment. This is because when you change a car’s suspension, it alters the whole geometry and changes the angle at which the wheels meet the ground below. So you’ll need to take the car to a mechanic or tyre workshop to get everything back into alignment.
And there you have it! You’re now ready to carve up some corners even better than before. Remember to enjoy your car responsibly, and if you really want to get your Tokyo Drift on, it’s probably a good idea to take it to a race track where you can drive like a maniac without the danger of hitting a tree or hurting pedestrians and road users.

How to build a home gym


HOW TO BUILD A HOME GYM

By Gavin Deriu

Background:

It’s great to be fit! We all know the benefits, but sometimes it’s hard to get motivated to work out, or to drag yourself all the way to a gym and pay the pricey membership fees. The solution? Make yourself a cheap, super conveniently-located home gym! I did this myself about 2 years ago and it has been an awesome investment. You don’t have to go all-out like I did, but here are some basic steps to create a home gym of your own...


STEP 1:

You’ll need a designated workout area at least the size of a small single bedroom. It could be in your spare garage, in the basement, or a spare room. Just make sure the floor is solid and flat (preferably a concrete base) because you may be picking up and dropping heavy weights.

For me, the area I chose was an empty L-shaped concrete/brick room underneath my house. I gave the walls a paint and sprayed the timber-beamed roof in black.


STEP 2:

It’s a really good idea to have some kind of rubber matting on the floor. I used rubbery square tiles that fit together like jig-saw puzzle pieces, bought from Bunnings. They’re great because they’re cheap and you can cut them down to fit the shape of your room or any steps/contours (see the picture below). They’re hard enough that you can walk on them without it affecting your balance, but soft enough to absorb any heavy impacts from dropping weights, and they’re comfortable to lie down on when doing sit-ups and ground exercises.


STEP 3:

There are a few other gym essentials that you’ll need for your workout area, such as mirrors. Not because you love yourself and want to be able to see yourself flexing, but rather because weight training requires good form and technique, and being able to see yourself doing an exercise means you can make sure you’re doing it right.

Full-length mirrors can be bought from Bunnings or even places like Target, but if you’re on a budget try searching eBay and Gumtree for old mirrors that you can buy for next to nothing.


STEP 4:

It’s also a good idea to have a cabinet or some shelving somewhere in your gym. You may not be as OCD-affected as me, so neat and tidiness might not be an issue for you, but in any event it means you can store small gym bits and pieces in one place so that they’re not lying around on the floor being a tripping hazard. Things I keep there include:

-          Hand clamps

-          Boxing gloves

-          Gym towels

-          Drink bottles

-          Cable extensions and handles for the gym equipment (we’ll get to that later)

-          A small stereo (essential – music makes training much more enjoyable)


STEP 5:

OK, now it is time to get yourself some necessary gym EQUIPMENT. The first and most basic things you’ll need are some dumbbells, a barbell and a flat bench. With these (and some weights) you can do a huge amount of chest, back, arm, shoulder and core exercises.


In this photo you’ll see two dumbbells in the foreground, and on the wall is a barbell (below) and an Ezy-bar barbell (above).


STEP 6:

The second piece of equipment you’ll need is some kind of all-in-one training station. Below you’ll see a picture of one I picked up second hand for under $200. It consists of a bench that you can incline/decline, a barbell bench press, a squat rack, and some hinged arms that you can use to do leg exercises.

A training station like this is great because it’s so versatile. Note that you may have to dismantle it to fit it through your gym door as I had to do. But it’s a piece of cake to put it back together.


STEP 7:

The third wave of equipment that you should consider for your home gym includes a dip bar, a pull-up bar and a ceiling bar. These are great, especially if you prefer to do body-weight exercises. Make sure they are VERY FIRMLY secured into your wall/ceiling though, because they’ll be carrying your whole body weight and possibly more.


STEP 8:

A fourth piece of equipment that comes in handy is a cable set. This isn’t essential, but it’s good to get some variety in your workouts and cable pulling exercises provide just that. Once again, make sure it’s secured into the wall and floor so that it doesn’t fall on you!


STEP 9:

I know what you’re thinking – hey, where’s all the cardio equipment? Where are the treadmills, the rowing machines, the stepping machines? Well they’re not here because they’re damn expensive, and chances are they’ll use up too much precious space in your home gym anyway.


I’ve always been of the opinion that if you want to go for a walk, a run, or a bike ride, you should just go outside where you have a whole world to walk/run/ride through. Don’t coup yourself up inside! What if it’s raining? Well if you really must, buy a cheap exercise bike like I did. If nothing else, it’s good for warm ups and warm downs. An even better cardio idea is to buy a punching bag and some boxing gloves, and punch/kick/elbow/knee your way to fitness.


STEP 10:

Now you have your gym room all set up and you have the necessary equipment, it’s time for the finishing touches. First, you MUST hang a macho-bodybuilder photo up on the wall. Most people go with Schwarzenegger, but I went with this signed picture of his close mate Franco Columbu. What a beast!


You also need a sign for the door to let people know that this is in fact a designated gym area, and not just any kind of room.  Something like this (below) will suffice and is also a bit of a laugh...


Now you’re ready to go – good luck and be safe! Remember if you’re training alone, always use a safety rack to ensure you won’t be crushed by a set of weights, or do as I did and secure some strong hooks to the ceiling so that you can rig up the weights and prevent them from dropping completely. Enjoy the convenience of having your own home gym!

How to Survive a Zombie Apocalypse

How to Survive a Zombie Apocalypse 

 (Note we take no liability if the following fails)  

By Angalie Welivita 


It is secretly one of my all time dreams/ fears for a zombie apocalypse to occur in my lifetime. The amount of movies I've watched to prepare myself for the day when a zombie apocalypse will happen is a serious problem … but nonetheless I am fully prepared for one if it does occur. So I'm revealing some of my tactics to help you in a zombie apocalypse, please comment and share. 

1. Run & Hide- Literally run. 
Ideally run away from anyone trying to kill,eat, or turn you into  zombie. Hide from them until it is safe to get to a better area/ gather supplies. 

2. Supplies- gather as much clean water, medical supplies(first aid kit, and medications)a sterile kit and non-perishable food. whilst gathering supplies make sure you get some weapons, I would go for a knife and gun - remember don't forget the bullets. you'll also need duck tape and rope - never know when it could come in handy. 

3. If you're travelling by an automated vehicle - make sure you have petrol/gas and any other tools to keep a vehicle running. 
Ideally if I had the funds I would get this bad boy 


4. If you're travelling by foot- make sure you get a good pair of hiking shoes. Camping essentials such as a sleeping bag, lighter/matches, a tent if you can carry it, a torch (remember batteries) , if you're strong enough tools; that can help you hunt and catch fish would be beneficial as well. 

5. Be alert!!- always be alert, if you're in a group take it turns on who keeps watch. 

6. Keep up to date on what is happening in the surrounding areas. If you hear of a a safe zone, try and make your way to the zone. 
In order to keep up to date - you'll mot likely need a radio as it would be the most reliable technological device to help you 

7. You will need identification - therefore store all your original documentations (birth certificate, passport etc ) in an easily accessible place, so you can grab it quickly. 

8. prepare to kill - unfortunately you will most likely have to kill ( fight off) a zombie. Now this can be very daunting for most people, however it can be a life or death situation. 


9. Prepare to be killed- even worse than above ^ ; you may be killed yourself by the zombie, so be prepared for that. After all it is 'survival of the fittest and smartest' 

10. Make sure the apocalypse is real - some people do pranks to pretend zombie apocalypses are about to occur. Keep your guard up - but don't go all ninja on them until you know for sure … awkward if someone was playing a prank. 

Ultimately surviving a zombie apocalypse will come down to the choices each individual makes…. and whether or not they would do anything to survive. 

Below is a link which is an actual US Government emergency recommendation survival guide. Have a read and post in the comment section what you think.